
Removing the old Hema HN6 Battery
Okay lets get down to the reason why you are reading this article.
Place the Hema HN6 on a soft cloth with the screen facing towards you, then flip over the Hema HN6 so that the back is facing. You will see 4 small screws on each of the corners. Using a suitable screw driver (such as a jewelers screw driver), unscrew the four screws
-
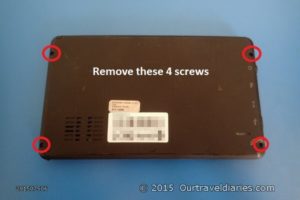
- The back of the Hema HN6 showing the screws to remove
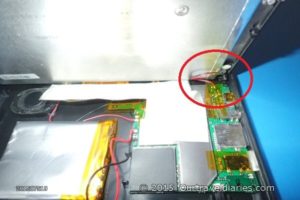
Caution the front cover of the Hema HN6 with the LCD display is attached to the back cover, be careful when prying apart
Pry the front and back covers apart with care making sure you do not separate the front and back by too much as the two halves are attached together and breaking any wiring may brick your Hema HN6, then hold or prop open the two halves.
-

- Prop open the Hema HN6
-
- Dont open the Hema HN6 up too much
Caution: Be careful unsoldering the battery wires and do not allow the solder to run or apply too much heat to the circuit board as the Hema HN6 may be damaged
Update: I now recommend that the two wires to the circuit board are cut and the new battery wires are joined in rather than soldering. This removes the risk of damage to the circuit board.
With a soldering iron, unsolder the two (red positive + black negative) wires running from the battery to the Hema HN6 circuit board.
-
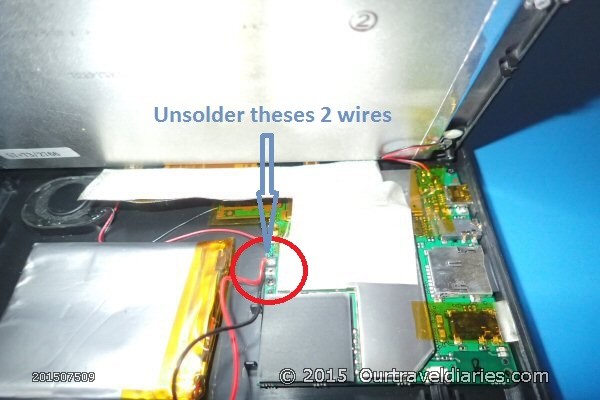
- Unsolder these two wires in the Hema HN6
The battery in the Hema HN6 is held in place with double sided tape and may require a bit of effort to remove. Be gentle when removing the old battery.
-
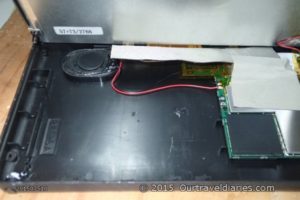
- The Hema HN6 with the battery removed
-
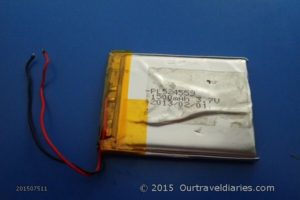
- The old Hema HN6 Battery
Views: 10730