
Installing the new Hema HN6 battery.
Caution: solding the battery wires involves some risk
Check the Positive and Negative connection points on the circuit board to make sure there has been no solder runs or damage. Clean up the connections if required being careful not to damage/over heat the circuit board.
-
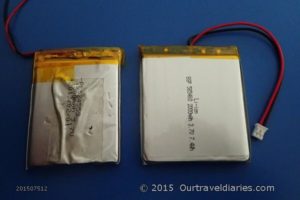
- The old and the new batteries
-
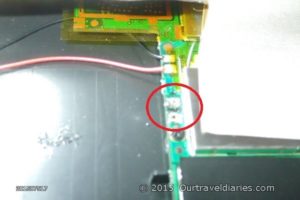
- Check the connection points on the Hema HN6
Cut off the new battery’s JST connector (if it has one). Cutting a single wire at a time as cutting both together may cause a short as the cutting tool (if its metal) will create a bridge between the Positive? and Negative wires. Next carefully solder the wires from the new battery onto the Hema HN6 circuit board. Again I will stress the importance of using caution to do this. If you allow too much heat to get into the circuit board, or allow the solder to run, or use too much solder it may damage the circuit board or cause a short and brick your Hema HN6 Navigator
-
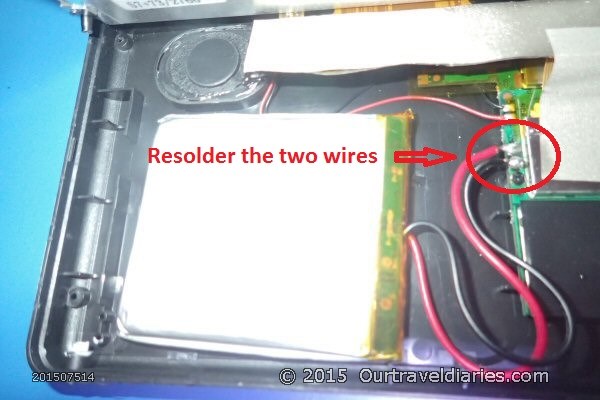
- Solder the Batteries wires to the Hema HN6 here
Put some double sided tape on the battery checking that it will not make the battery too thick and cause problems when closing the two halves back together. Next attach to the Hema HN6 back cover. Close up the front and back covers, reinsert the four corner screws and you are all done.
-
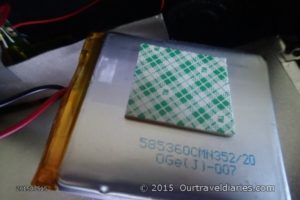
- Attach double sided tape to the battery
Switch on the Hema HN6 and if everything was done right the Hema HN6 will fire up. Congratulations you have now successfully replaced the battery in the Hema HN6 and saved yourself a few dollars in doing so.
Views: 10730